🏋️‍♂️ Weighted Vest Calorie Calculator (Included in Our Rucking Calculator)

Most people don’t realize it, but if you’re walking or training with a weighted vest, you’re already rucking. The only difference is how the weight sits on your body.
That’s why the official Rucking Calorie Calculator already doubles as a weighted vest calorie calculator — with the ability to switch between vest and backpack styles.


🔥 Weighted Vest vs Backpack: What’s the Real Difference?

Both forms torch calories faster than walking, but your body mechanics shift slightly:

  • Weighted Vest (Even Load): The weight is distributed evenly across the front and back. This keeps your posture upright, lowers joint stress, and still dramatically increases calorie burn.
  • Backpack (Rear Load): The same weight feels roughly 7% harder on your body. That’s built into the calculator automatically — when you toggle “backpack,” the formula adds a 1.07 multiplier for the extra effort.

So whether you’re training with a Wolf Tactical vest (Amazon link) or a CamelBak Motherlode backpack (Amazon link), you’ll get accurate results for your specific setup.


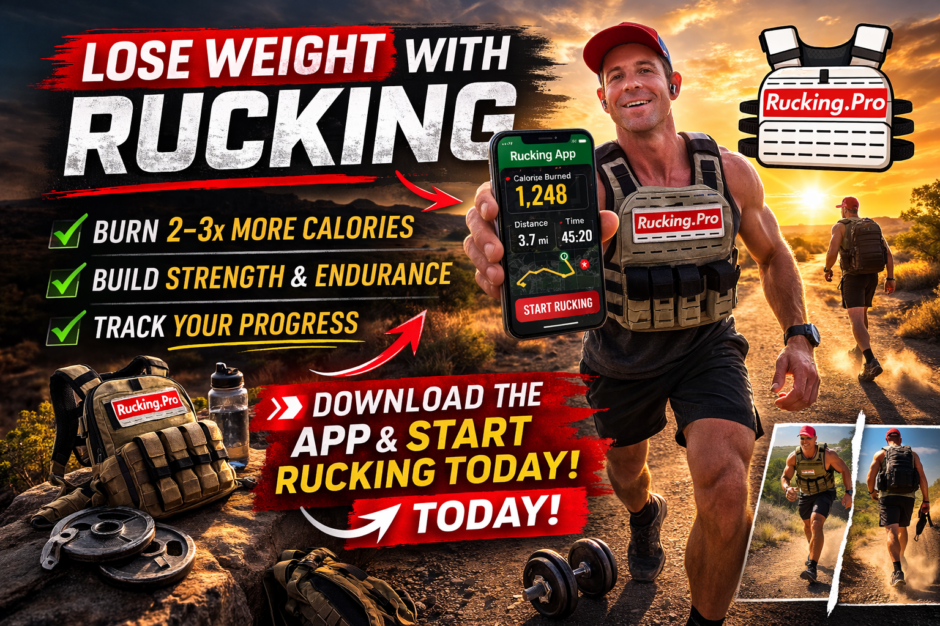
⚙️ How the Weighted Vest Calculator Works

Our formula was built from real-world testing and military research.
It estimates calories burned based on:

Calories = Distance × (BodyWeight × 0.57 + PackWeight × 1.23) × Effort × Pack Type Modifier
  • Effort adjusts for terrain (flat, hills, trails).
  • Pack Type lets you switch between “Vest” or “Backpack.”
  • The calculator updates instantly as you change values — no guessing, no gimmicks.

👉 Try it now: Rucking Calorie Calculator


💪 Why Weighted Vest Rucking Works

Training with a weighted vest builds:

  • Cardio endurance without running
  • Core strength and posture
  • Metabolic output — you burn 2–3× more calories than walking

Whether you’re rucking through trails, walking your neighborhood, or doing stair climbs, the results are the same: more load = more calories burned.


🧭 Bottom Line

If you came here searching for a weighted vest calorie calculator, you’ve already found it — it’s built right into the Rucking Calorie Calculator.
Just pick your pack type, set your distance and weight, and get your real-world calorie burn in seconds.

➡️ Try the Rucking Calorie Calculator Now

Posted in Rucking Calculators | Tagged , , , , , | 57 Comments

Why Boots Beat Running Shoes for Rucking

511 tactical rucking boot

When you’re carrying serious weight on your back (or chest, if you use a weighted vest), your footwear matters. I’ve been testing out the 5.11 Tactical ATAC Boots for the last couple weeks, and they’ve already earned their spot as my go-to rucking boots. Here’s why.


Boots vs. Running Shoes for Rucking

Running shoes feel great at first. Soft cushioning, light on the feet, flexible. But once you throw 50+ lbs on your body and hit the trails, those same qualities become weaknesses:

  • Cushion compresses too fast under heavy loads. What felt springy on day one is flat by week three.
  • Low ankle support leads to rolled ankles, especially on uneven ground.
  • Thin soles wear down quick when you’re logging miles with extra weight.
  • Higher injury risk from stress fractures, shin splints, and blisters when the shoe starts breaking down.

By contrast, boots are built for load-bearing work—military patrols, tactical training, and long treks under stress. Exactly the kind of grind that rucking demands.


Why Rucking Boots Work

Here’s what I’ve noticed in my 5.11 Tactical boots:

  • Ankle stability: keeps you upright when carrying 50 lbs+ across trails, hills, or uneven terrain.
  • Durable outsole: grips dirt, rock, or pavement without blowing out like running shoes.
  • Load distribution: stiff midsoles transfer weight more evenly, sparing your arches.
  • Longevity: weeks in, and they still feel solid—while a pair of running shoes would already be showing cracks.
  • Versatility: works for rucking, hiking, or any tactical load-bearing activity.

My Real-World Setup

I regularly ruck with 50 lbs or more, using either a Wolf Tactical vest and a CamelBak pack. The boots let me keep pace, protect my joints, and keep logging miles without worrying about blowing out my footwear or ankles mid-ruck.

Pair your boots with a weighted vest or backpack, then use my Rucking Calorie Calculator to see how many calories you’re burning each session. Rucking isn’t just walking—it’s resistance training plus cardio, and your boots are your foundation.


Final Word

If you’re serious about rucking, don’t sabotage yourself with running shoes. Invest in boots built for weight, miles, and abuse. I recommend the 5.11 Tactical ATAC Boots because they balance durability, comfort, and price—and they’re built for exactly the kind of work rucking throws at your body.

Posted in Rucking Gear | Tagged , , , , , , | Leave a comment

The Best Rucking Backpacks for Training and Everyday Use

When you first start rucking, you don’t need a fancy setup. Grab a sturdy backpack, throw in some weight, and hit the trail. But as you start logging more miles, the backpack you choose makes a big difference in comfort, durability, and how much weight you can carry safely.

Why Your Backpack Matters in Rucking

Carrying extra weight changes everything. A standard school bag or laptop backpack will dig into your shoulders and fall apart under stress. Purpose-built rucking backpacks are designed with reinforced stitching, wide padded straps, and weight plate pockets that keep your load high and stable on your back. That stability matters—poor weight distribution increases fatigue and risks injury.

Popular Options

1. CamelBak Motherlode – A versatile tactical hydration pack with a 100oz reservoir. It’s tough enough for long outdoor sessions and doubles as a day-use bag. I carried this pack for years before switching to a weighted vest. Check it out here.

CamelBak Motherlode backpack used for heavy rucking — durable, hydration-compatible, and loaded with 50+ lbs for training.

2. GoRuck Rucker – The classic rucking backpack. Built with 210D Cordura, thick padded straps, and elevated weight plate sleeves to keep 20–75 lbs stable against your back. It even has lumbar support padding to reduce strain.

3. Budget Options – If you’re just testing rucking, you can start with a cheaper bag and standard weight plates or water jugs. But expect wear and tear fast. If you plan to stick with it, upgrade sooner than later.

Backpack vs. Weighted Vest

I personally use a Wolf Tactical Weighted Vest with custom steel plates. The vest distributes weight evenly on your chest and back, which feels different than a backpack. Backpacks pull from behind, forcing more core engagement and posture control. Vests balance the load but can feel restrictive on long treks. Both tools work—it’s about preference.

Wolf Tactical white weighted vest loaded with 50 lbs — used for daily rucking to build strength and burn fat.
Best Weighted Vest For Walking 2025 Wolf Tactical

How to Load Your Rucking Backpack

  • Start Light: 10–20 lbs for beginners.
  • Pack Tight: Use towels or foam around plates to prevent shifting.
  • Keep Weight High: Heavy items should ride against your upper back, not sag at the bottom.
  • Hydration Ready: If your pack has a water bladder, use it. Staying hydrated is half the battle.

Track Your Burn

Want to know how many calories you’re torching with your ruck? Try my calculators:

Rucking Calorie Calculator with inputs for body weight, pack weight, distance, and effort level, designed to estimate calories burned during ruck workouts.
Screenshot-style graphic of the Rucking Weight Loss Calculator with bold white and orange title, dark input interface, and calculate button
Find out how long it’ll take to reach your weight loss goal with rucking — based on your weight, ruck setup, and daily habits

Rucking backpacks are more than just gear—they’re part of the grind. Find one that fits, load it right, and you’ll unlock one of the most underrated fitness tools out there.

Posted in Rucking Gear | Tagged , , , , , , , | Leave a comment

Best Rucking Vest for Women: Comfort, Fit, and Performance

When it comes to rucking, the right vest makes or breaks your training. For women, this matters even more—because most gear on the market was designed around men’s frames. A good women’s rucking vest balances comfort, adjustability, and load distribution so you can carry heavy weight without wrecking your shoulders or lower back.

What to Look For in a Women’s Rucking Vest

  • Even Weight Distribution – A vest that spreads load across the front and back (not just on your spine) reduces strain and improves posture.
  • Adjustability – Women often need more range for chest, waist, and torso fit. Look for wide, Velcro-secured straps or MOLLE-compatible panels.
  • Breathability – A mesh-backed vest prevents sweat build-up during long rucks.
  • Modular Weight System – Instead of stuffing bricks in a backpack, opt for steel plate slots that let you scale weight from 10 to 50 lbs.
  • Hydration Options – If you ruck long distances, a vest that works with a hydration bladder (or pairs with a backpack like a CamelBak) is ideal.

My Top Pick: Wolf Tactical Weighted Vest (Women-Friendly)

Pink Wolf Tactical weighted vest with adjustable straps, MOLLE webbing, and camouflage pattern — ideal for women’s walking or rucking workouts.
The pink Wolf Tactical weighted vest — adjustable, durable, and built for real training with style.

I’ve personally tested a lot of gear, and the Wolf Tactical Weighted Vest is the best balance of price, comfort, and performance for women. Here’s why:

  • Adjustable Fit: Wide straps and Velcro closures mean it hugs securely, even on smaller frames.
  • Front & Back Loading: Steel plate slots distribute weight evenly across the torso.
  • Compact Build: Unlike bulky military packs, it doesn’t restrict arm movement—perfect for smaller shoulders.
  • MOLLE Ready: Add pouches (yes, even for a Bucked Up shaker) if you want hydration or storage.
  • Scales with You: You can start with lighter plates and work up to a full 50 lbs.

Pair it with custom steel plates for a clean, streamlined setup.

Budget Pick: BAGAIL Weighted Vest (Women’s Favorite)

If you’re not ready to drop money on a tactical vest with steel plates, the BAGAIL Weighted Vest is a solid starting point. It’s especially popular with women thanks to the lighter weight range (5–30 lbs) and comfortable, flexible fit.

Why it works for women:

  • Smaller weight options: Start as light as 5 lbs and scale up gradually.
  • Form-fitting design: Sits snug on the torso without restricting movement.
  • Bright color choices: Stand out with a pink or patterned vest instead of tactical black.
  • Detachable pouch: Handy for your phone or keys on long walks.
  • Great for walking + running: Because it’s softer and less rigid than steel-plate vests, it’s more forgiving for cardio-style rucking.

👉 Check out the BAGAIL Weighted Vest on Amazon

This one isn’t built for heavy, military-style rucking—if you’re planning to go 30–50 lbs daily, I’d still recommend the Wolf Tactical. But for walking, fitness rucks, and weight loss, the BAGAIL vest is a comfortable entry point.

Alternative: CamelBak Motherlode for Long Hauls

CamelBak Motherlode backpack used for heavy rucking — durable, hydration-compatible, and loaded with 50+ lbs for training.

If your goal is distance and hydration, the CamelBak Motherlode is another excellent option. It’s not as compact as a vest, but it lets you:

  • Carry 100oz of water and whatever else you can fit
  • Add heavy weight plates
  • Adjust to uneven terrain with extra storage space

Many women prefer this for longer, trail-style rucks where water access is a priority.

Ruck Smarter: Use the Calculator

Your vest is only half the equation. The real key is knowing how much weight and distance burns the calories you want. Try our free tools here:

Posted in Rucking Gear Reviews, Women's Rucking | Tagged , , , , | Leave a comment

How to Start Rucking

Rucking is simple. It’s just walking with weight. But that simple shift can transform your fitness, endurance, and calorie burn.

Here’s the easiest way to start today:

1. Grab a Backpack

You don’t need fancy gear right away. Any backpack you have lying around will work.

2. Add Some Weight

  • Water jugs work great: 1 liter = ~2.2 lbs, so a full gallon is about 8 lbs.
  • Books, canned food, or plates work too.
  • Start with 10-20 lbs. As you get stronger, you can increase the load.

3. Start Walking

Head outside and go for a walk — around your neighborhood, a trail, or the park. Don’t tell anyone, don’t overthink it. Just start moving.

4. Progress Over Time

  • Walk 1–2 miles to start.
  • Add distance or weight gradually.
  • Aim for consistency — rucking 2–3 times a week is better than one giant march.

5. Upgrade Your Gear (Optional)

Once you’re hooked, better gear will make your rucks safer and more comfortable:

Extra: Know Your Numbers

Want to see how many calories you’ll burn?
👉 Try the Rucking Calorie Calculator .

Want to know exactly how long it’ll take to hit your goal weight?
👉 Use the Rucking Weight Loss Calculator .

Bottom line: You don’t need a gym membership, expensive shoes, or high-tech gadgets to start rucking. Just grab a pack, load it up, and start walking.

Posted in Rucking Basics | Tagged , , , , | Leave a comment

How to Wash a Wolf Tactical Weighted Vest (Step-by-Step)

If you ruck often, you already know your vest can get filthy. Sweat, dirt, and trail grime build up fast — and a good clean not only makes it smell better, it helps it last longer.

Here’s my exact process for washing my Wolf Tactical weighted vest.


🎥 Here’s what I did:


1. Remove all weight plates and attachments

Before you do anything, take out the steel plates and remove any MOLLE pouches or hydration bladders. This keeps water from getting trapped inside and speeds up drying.


2. Use warm water and mild soap

I wash mine in the bathtub using a simple sponge (yes, mine’s Hello Kitty) with a small amount of basic soap. You don’t need anything fancy — avoid harsh detergents or bleach that can weaken the fabric.


3. Scrub by hand

Focus on high-contact areas — shoulder straps, inside lining, and any spots with visible dirt. You can see in the video that even with one hand on the camera, the dirt comes right off.


4. Rinse thoroughly

Make sure all soap is removed. Leftover residue can stiffen the fabric or irritate your skin during your next ruck.


5. Air dry completely

Hang your vest somewhere with good airflow — outside is best. Avoid dryers or direct heat sources, which can warp the fit or damage the materials.


💡 Pro Tip: I run over 50 lbs in mine, and keeping it clean makes it way more comfortable and keeps it smelling fresh. For me, it’s more than just gear — it’s my emotional support vest.


Related:


Recommended Gear:

Fuel Your Rucks:

Posted in Rucking Gear, Wolf Tactical | Tagged , , , , , , , , | Leave a comment

Weighted Vest Calories Calculator: How Many Extra Calories Do You Really Burn?

Screenshot of the Rucking Calorie Calculator showing input fields for body weight, pack weight, distance, and effort level, with a result of 326 kcal burned.
Estimate your calorie burn based on total weight carried and effort level. This example shows 326 calories burned with a 100 lb pack at max effort.

Wearing a weighted vest doesn’t just make walking harder—it makes it more effective. But just how many extra calories do you actually burn when you’re carrying weight? That’s what this guide (and our free Weighted Vest Calories Calculator) is here to answer.

Why Weight Matters

Calorie burn is primarily driven by how much work your body has to do. The more weight you’re moving, the more energy you need. Your body doesn’t care if the extra weight is body fat or a 40 lb vest—it just knows it has to work harder.

This is the same reason someone who weighs 250 lbs burns more calories per mile than someone who weighs 150. A weighted vest turns your walk into a resistance workout, raising your heart rate, increasing load on your muscles, and revving up your calorie burn.

Real Numbers: How Much More You Burn

Let’s say you weigh 165 lbs and go on a 3-mile walk. Here’s what calorie burn might actually look like using our calculator:

  • No Vest: ~285 calories
  • 20 lb Vest: ~360 calories
  • 40 lb Vest: ~435 calories

That’s a difference of around 150 extra calories burned just from loading up. The more weight and the faster your pace, the more calories you burn. For best results, use our calculator to enter your own weight, pack type, pace, and distance.

The more weight, the bigger the burn. You can use our calculator to input your weight, distance, pack type (vest vs. backpack), and pace to get a better estimate.

Use the Weighted Vest Calories Calculator

Vest vs. Backpack: Not the Same

Backpacks put all the weight on your back. Weighted vests distribute it more evenly across your chest and back, which can:

  • Raise heart rate faster
  • Feel more stable
  • Burn slightly more calories due to core engagement

That’s why I personally use a Wolf Tactical Vest loaded to 50 lbs. It’s adjustable, secure, and way more comfortable than a saggy pack.

It’s Not Just Walking

A weighted vest makes everything harder. That includes:

  • Pushups: Your upper body has to push extra load.
  • Bodyweight Squats: Your legs work like you’re under a barbell.
  • Stair Climbs: Mimics hill sprints.
  • Rucking: Turns a hike into a calorie-torching workout.

These movements all burn more calories when done with extra resistance. That makes the vest a gym-on-your-chest—portable, scalable, and brutal in the best way.

Apple Watch & Fitness Trackers Get It Wrong

Most fitness devices estimate calorie burn based on body weight, height, heart rate, and pace. But they don’t account for external weight like a vest or pack. That means if you’re rucking or training with a vest, your Apple Watch could be underreporting calories by hundreds.

That’s exactly why I built this calculator. It gives a more honest number based on real load.

Final Thoughts: Every Pound Counts

If you’re walking to lose fat, build muscle, or reclaim your health, a weighted vest multiplies your effort. It forces adaptation. It boosts burn. And it helps you turn everyday movement into meaningful progress.

Want to know how many calories you burn? Plug in your stats here:

👉 Weighted Vest Calories Calculator

Bonus: Want to know exactly how long it’ll take to hit your fat loss goal while rucking? Try our Rucking Weight Loss Calculator. It breaks it down by distance, days per week, and weight carried.

Posted in Rucking Gear | Tagged , , , , , , , | Leave a comment

Rucking Vest for Women: Best Options, Fit Tips, and Real-World Use

Smiling athletic woman rucking at sunset in a pink Wolf Tactical weighted vest, with mountain landscape in the background.
A woman rucks confidently in a pink Wolf Tactical vest, combining style and performance during a sunset hike.

Not all weighted vests are made for rucking. And definitely not all are made for women. Most big box options flop around, pinch in the wrong places, or are impossible to adjust once you’re moving. If you’re serious about rucking and want a vest that works with your body—not against it—here’s what matters.

🔍 What Makes a Rucking Vest “For Women”?

A great rucking vest for women needs to check three boxes:

  1. Adjustable Fit: Women typically need more adjustability in the chest and waist area. Look for vests with solid velcro panels, elastic sides, or strap systems—not fixed sizes.
  2. Balanced Load: You want front and back weight distribution. Front-heavy setups strain posture and make breathing harder. I use this Wolf Tactical vest (affiliate) because it’s modular and lets me fine-tune my loadout.
  3. Freedom to Move: Some vests ride too low or restrict arm movement. For walking, trail rucking, or stair climbs, freedom is non-negotiable.

🛠 My Setup (and Why It Works)

I’m down 90 pounds thanks to rucking. I carry 50 lbs daily using the Wolf Tactical weighted vest with custom 50 lb steel plates (affiliate). It distributes weight evenly, hugs close to the body, and lets me breathe deep while hiking Texas hills.

I also clip a hydration bladder to the back when I need longer endurance or train with my CamelBak Motherlode for extra pack weight—though the vest alone is enough for most people. For some women, especially those with larger chests, a backpack-style setup like the CamelBak can also reduce discomfort. Metal plates across the chest can cause irritation or pressure on the breasts and even the nipples depending on fit and fabric. If that’s a concern, consider alternating between setups or adding extra padding between your base layer and the vest.

🎯 Female-Specific Rucking Tips

  • Start lighter than you think. 10–20% of your bodyweight is a good starting range.
  • Vest vs Backpack? Backpacks shift. Vests stay put. For urban walking or stair climbs, vests win. For long hikes, a backpack might be more comfortable with heavier loads.
  • Watch your posture. Rucking helps fix your gait and core strength—but only if the vest sits right. Tighten midline straps so it hugs, not chokes.

📸 Featured Pick: Pink Wolf Tactical Vest

Pink Wolf Tactical weighted vest with adjustable straps, MOLLE webbing, and camouflage pattern — ideal for women’s walking or rucking workouts.
The pink Wolf Tactical weighted vest — adjustable, durable, and built for real training with style.

If you want a standout option that’s built for real use and still looks clean, check out the pink Wolf Tactical vest (affiliate). Same build quality, same MOLLE system, and fits almost any torso. It’s my go-to recommendation for women just starting out or leveling up their daily walks.

Posted in Rucking Gear, Rucking Gear Reviews, Women's Rucking | Tagged , , , , , , , | Leave a comment

Grip Strength While Rucking: Real-World Hand Training in a Weighted Vest

Most people think rucking is just a cardio thing. You throw on some weight, go for a walk, and burn calories. And yeah — that’s true. But rucking can be a lot more than that. Once you understand how to modify it, it becomes a mobile strength platform. You can layer in resistance, build muscular endurance, and train in ways that translate directly to the real world.

This time, I hit San Angelo State Park wearing a 50 lb Wolf Tactical weighted vest — nothing new there. But I added something else: 100 lb hand grippers.

Why Grip Strength Matters

Your hands are used every day — not once, but hundreds of times. Opening doors, carrying groceries, pulling yourself up, lifting weights, working on tools. Real-life hand strength isn’t about how much you can squeeze one time — it’s about whether your hands can keep working when everything else wants to quit.

That’s why I don’t just train grip for power. I train for endurance. While covering 3 to 5 miles on foot, I’m doing 20 reps per hand with my 100 lb grippers, switching back and forth as I go. That’s hundreds of reps over time — just like life demands.

Rucking Modifiers: Build While You Move

I call these “modifiers.” Not everything needs to be a circuit or a bootcamp. Rucking is flexible. You can add:

  • Different footwear (boots, barefoot shoes)
  • Different weight levels (vests, packs)
  • Sandbags or water bottles in hand
  • Grippers or resistance bands
  • Even phone calls, content creation, or work — all while walking

Today’s modifier? Grip training — but it could’ve been anything. The idea is simple: rucking doesn’t waste your time. You can train more than one thing at once. That’s what makes it better than walking, better than jogging, and way more effective than sitting in a gym machine.

The Setup

Here’s what I used:

  • 🎒 50 lb Wolf Tactical weighted vest (get it here)
  • 100 lb grippers from a full 50–350 lb set
  • ☀️ Texas sun and 3–5 miles of state park terrain
  • 🥤 Bucked Up shaker cup riding in my front pouch (free samples here)

Want Your Own Grippers?

The exact grippers I use go up to 350 lbs, but most people don’t need that — yet. This set right here goes from 50 to 200 lbs in smaller, more manageable intervals. That means you’ll actually see progress, not just strain. I’d honestly pick up a set myself if I didn’t already have mine.

👉 Amazon Gripper Set (50–200 lbs)

They’re compact, sturdy, and perfect for this kind of training.

Why This Matters for Fat Loss and Strength

People trying to lose fat often focus on “cardio” — but when you ruck with modifiers like this, you’re doing low-impact strength training at the same time. That keeps your heart rate in the fat-burning zone while building muscle endurance.

Your watch won’t count the gripper effort. But your body will.

And if you’re trying to keep your hands strong for life — whether for lifting, climbing, or just keeping your independence as you age — this is the kind of training that pays off.

Real Grip Strength vs. Grip Endurance (And How to Train Both)

I’ve been able to close a 250 lb gripper for years. Not just once — consistently. That kind of grip strength doesn’t come from machines or gimmicks. It comes from real-world use. I played tennis for years, and way back — almost 20 years ago — I bought my first pair of hand grippers and started training early. I didn’t even know what I was doing at the time, but that foundation stuck.

That’s why I don’t just train strength or just endurance — I train both.

If you’re serious about building grip that lasts and hits hard, here’s a strategy I recommend:

🧩 Do Drop Sets While Rucking

  1. Start with the heaviest gripper you can close for at least 2–3 reps.
  2. Do as many reps as you can until failure.
  3. Drop to the next lower resistance and repeat.
  4. Keep going all the way down the line.
  5. Swap hands every 20 steps or so and repeat the cycle.

Any weight, if you wait long enough, you can do it again. That’s the key: recovery during movement. Rucking lets you recover on the move — you’re never sitting still, and you’re never wasting time.

And if you can do that with your grip, you can do it with anything.

Posted in Rucking Workouts | Tagged , , , , , , , , , | Leave a comment

Rucking for Beginners: How to Start the Smart Way

If you’re new to fitness, burned out on cardio, or just want to feel strong again, rucking might be the easiest way to begin.

Rucking means walking with weight—that’s it. You don’t need to run. You don’t need to lift. You don’t need a gym. All you need is a backpack (or weighted vest), some weight, and a destination.

It’s free to start. It scales with you. And it works. Whether you’re trying to lose weight, improve endurance, or just get outside more often, rucking is low-barrier and high-reward. It’s one of the few workouts where nearly anyone can start seeing and feeling results with just a little consistency.


🔄 Step One: Start Simple

  • ✅ Grab a backpack and throw in some books, water bottles, or gear. Start with 10–20 lbs.
  • ✅ Keep your posture tall and stride relaxed. Rucking is not running. It’s smarter.
  • ✅ Choose a short route (20–30 minutes max). Let someone know if you’re going alone.
  • ✅ Bring water, stay alert, and keep your phone on you.

You don’t have to go fast. You just have to go.

You can ruck around your neighborhood, on a trail, at a park, or even inside on a treadmill. It’s quiet, it’s simple, and it fits into almost any schedule. For some people, it’s as much mental as it is physical—a way to unplug, reset, and feel productive.


💼 Upgrade Option: Wolf Tactical Weighted Vest

While a backpack works to get started, it bounces, shifts, and pulls on your spine unevenly. Once you’re ready to level up, switch to the Wolf Tactical Weighted Vest:

  • Evenly distributed weight (front/back)
  • Fully adjustable straps
  • Modular plate loading system
  • Low bounce, high comfort
  • Lifetime warranty

This vest makes rucking easier, more stable, and way more versatile. It even has MOLLE webbing for attachments and Velcro for patches. You can carry a Bucked Up shaker, a phone pouch, or emergency essentials. It turns your vest into a mission-ready toolkit.

The better your gear fits and functions, the more likely you are to keep going.

Wolf Tactical white weighted vest loaded with 50 lbs — used for daily rucking to build strength and burn fat.
Best Weighted Vest For Walking 2025 Wolf Tactical

🌿 Tips for Beginners

  • Don’t overdo it. Start slow and low with both time and weight.
  • Be consistent. Three short rucks a week beats one long one you never do again.
  • Hydrate. Use a CamelBak or bring water.
  • Ruck your routine. You can ruck while walking your dog, going to the store, or hiking with friends.
  • Track your time. Focus more on time spent walking than distance or pace in the beginning.
  • Watch your form. Stand tall, engage your core, and let your arms swing naturally.

Rucking is easy to learn, but it’s worth doing right. Over time, your posture improves, your back and legs get stronger, and your cardiovascular health improves without the wear and tear of running.


🎒 Beyond the Basics: Next Steps

As you get more comfortable, you can:

  • Add more weight (5 lbs at a time is plenty)
  • Extend your route to 45–60 minutes
  • Include bodyweight exercises like squats or push-ups mid-ruck
  • Upgrade to a weighted vest for more balance and control

You can also pair your rucking habit with supplements like Bucked Up Hydrate, Long Range, or Pumpocalypse to stay fueled and recover faster.

Want to go even further? Combine your weighted vest with a CamelBak Motherlode to carry gear, water, or snacks. It’s rugged, reliable, and ideal for long walks or hikes.


✨ Final Thought: It’s the Easiest Hard Workout

Rucking can be as easy or as hard as you want. You can start today with a backpack. You can upgrade later. You can walk slow forever and still outwork most people at the gym.

It builds strength. It burns fat. It clears your mind. And it’s scalable from day one.

Rucking is the best beginner workout in the world—because it works, and anyone can do it.

Posted in Rucking Gear | Tagged , , , , , , , , , | Leave a comment